 |
| Screenshot1 |
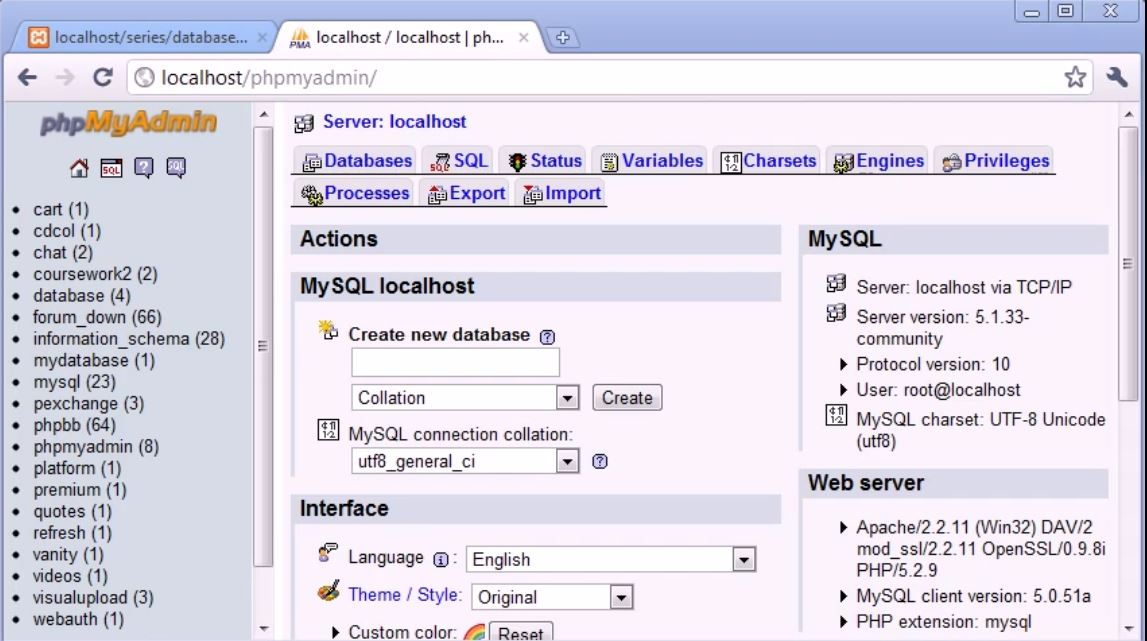
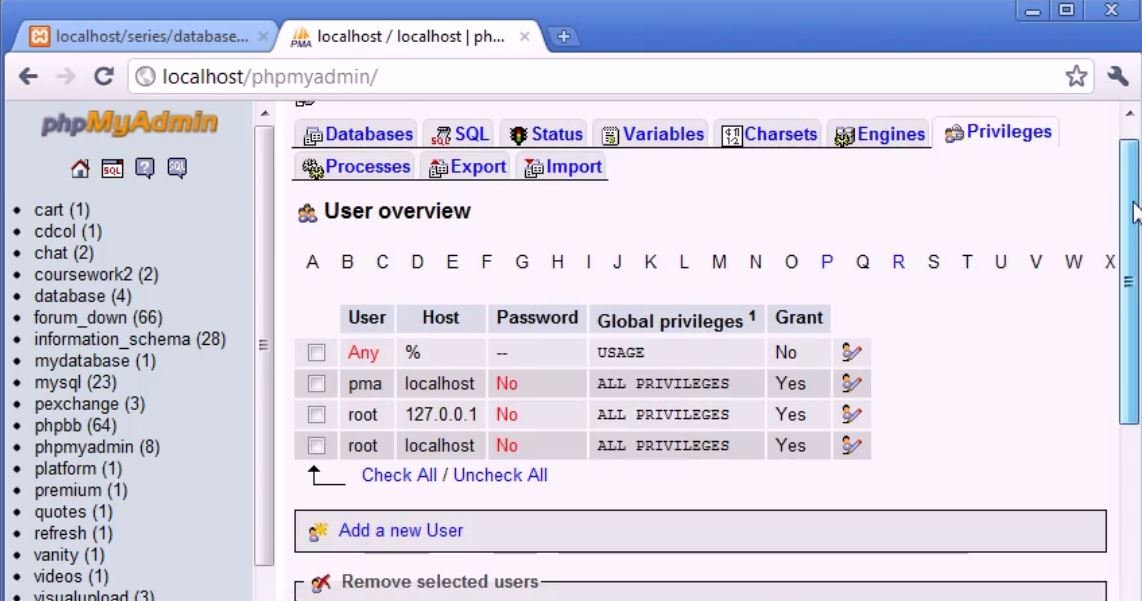
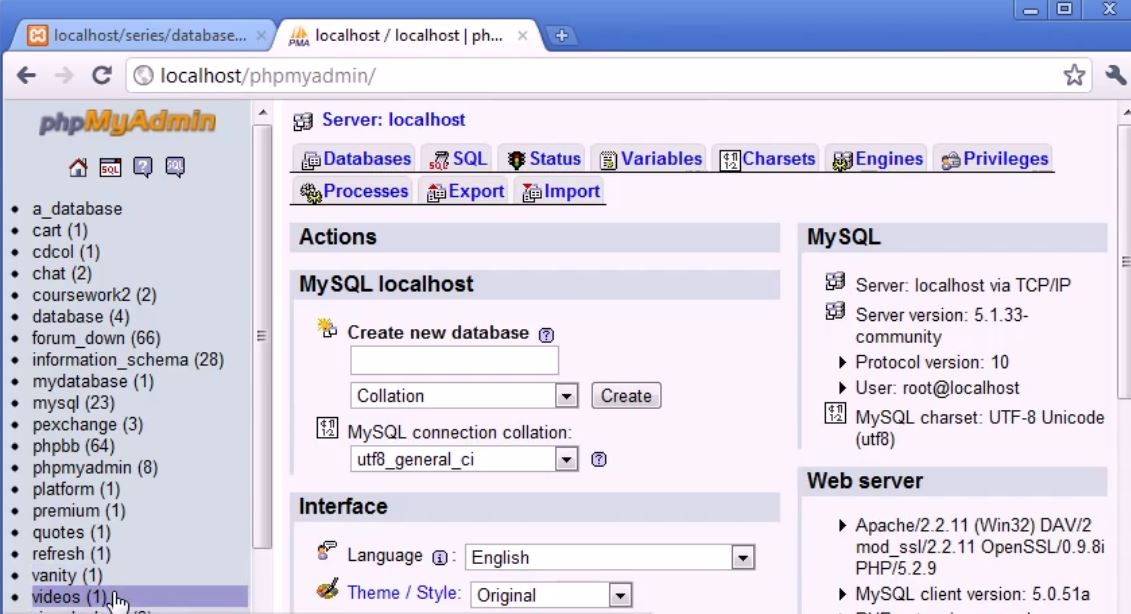
Introduction to database article i had wrote about why we use it databases. Now we need to find easy way manage our database. Before we start it we will connect to our database then we can add and retrieve data. Screenshot1 is the Screenshot of phpmyadmin and its freely available piece of software it does comes with xampp If we go to http://localhost in You can see it represented with xampp control panel and on that page you can see in left navigation down tools and you can see phpmyadmin so, If you just click on that you can see screen of phpmyadmin like screenshot1. If you don't had xampp you running something else then you can download phpmyadmin copy overview and set you database setting in there so your server in which you working like localhost and then everything will be manage for you.
 |
| Screenshot2 |
 |
| Screenshot3 |
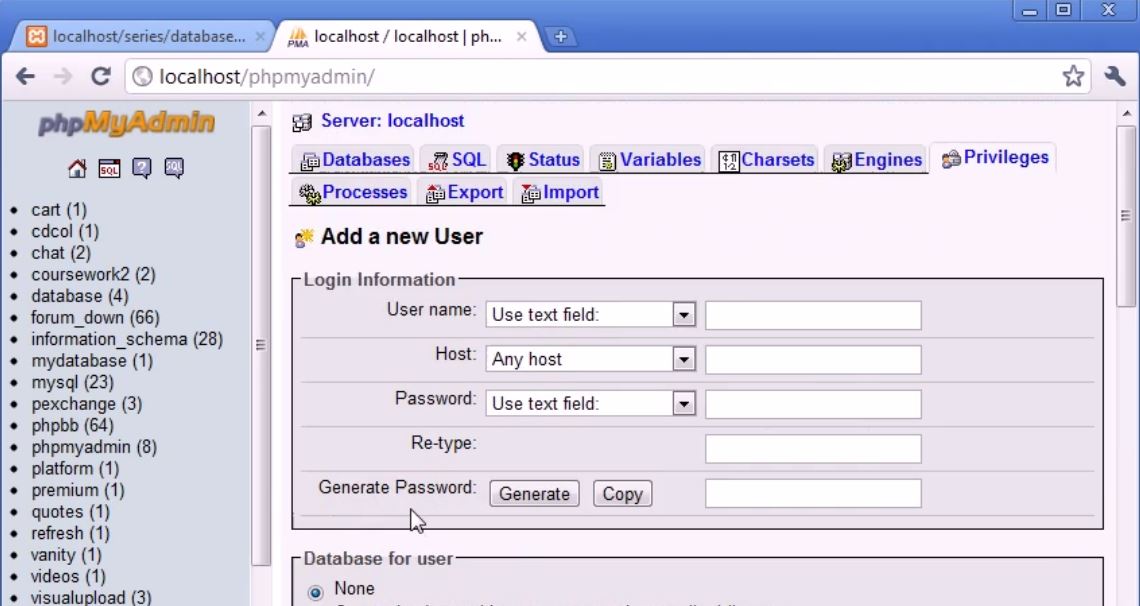
Server: localhost
username: root
password: NULL
 |
| Screenshot4 |
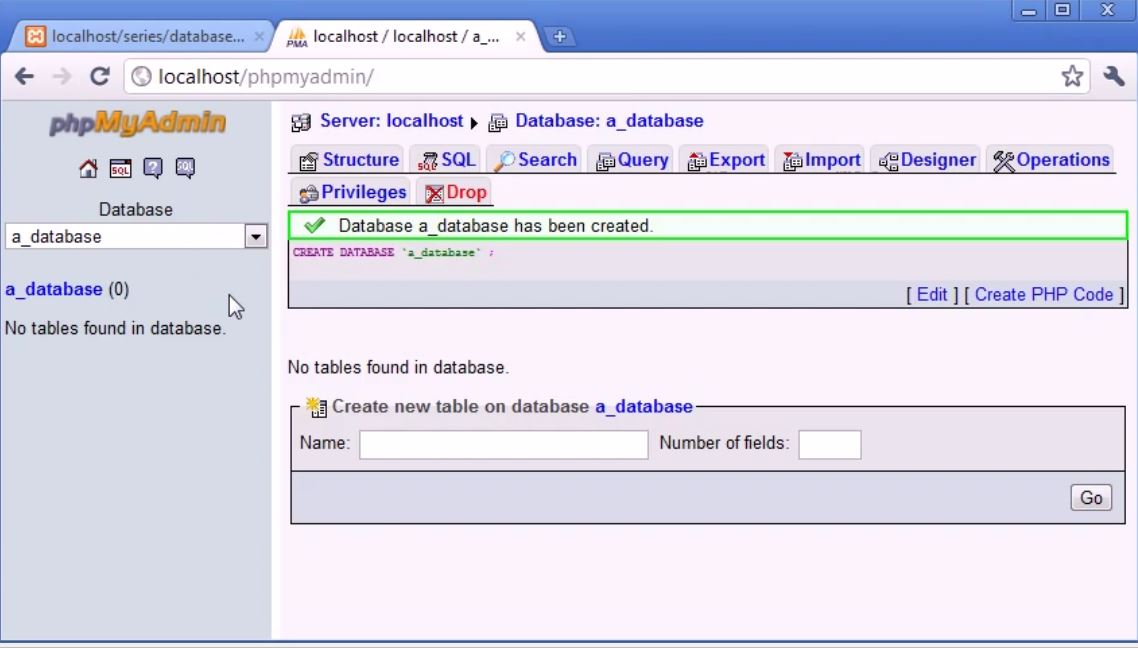
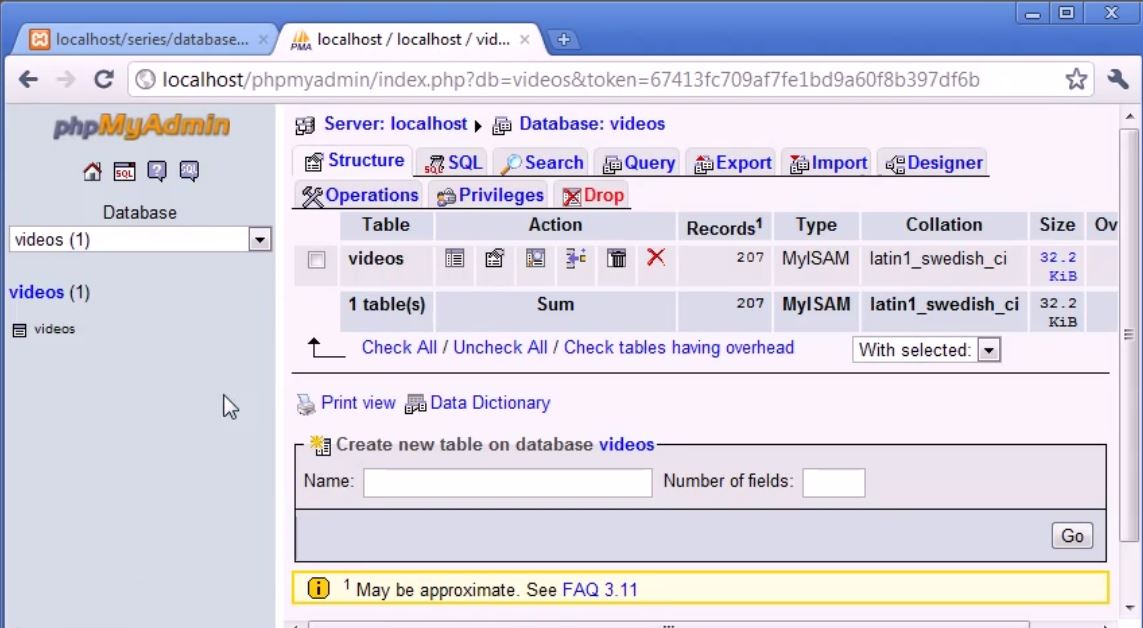
This all we need to use to connect to our database Now we not going looking at that now we are just seen how you can find this information. Now Lets Go to Screenshot1. left side you can see the databases that i had created Years and months ago just think i have worked in general So, You can see database name for example cart, quotes, Videos, this are databases name and to create a new database we you create new database in Screenshot1. So, i can create new database just called a_database and will click create now you can see screenshot4 a_database had created and you can see in screenshot4.
 |
| Screenshot5 |
 |
| Screenshot6 |
 |
| Screenshot7 |
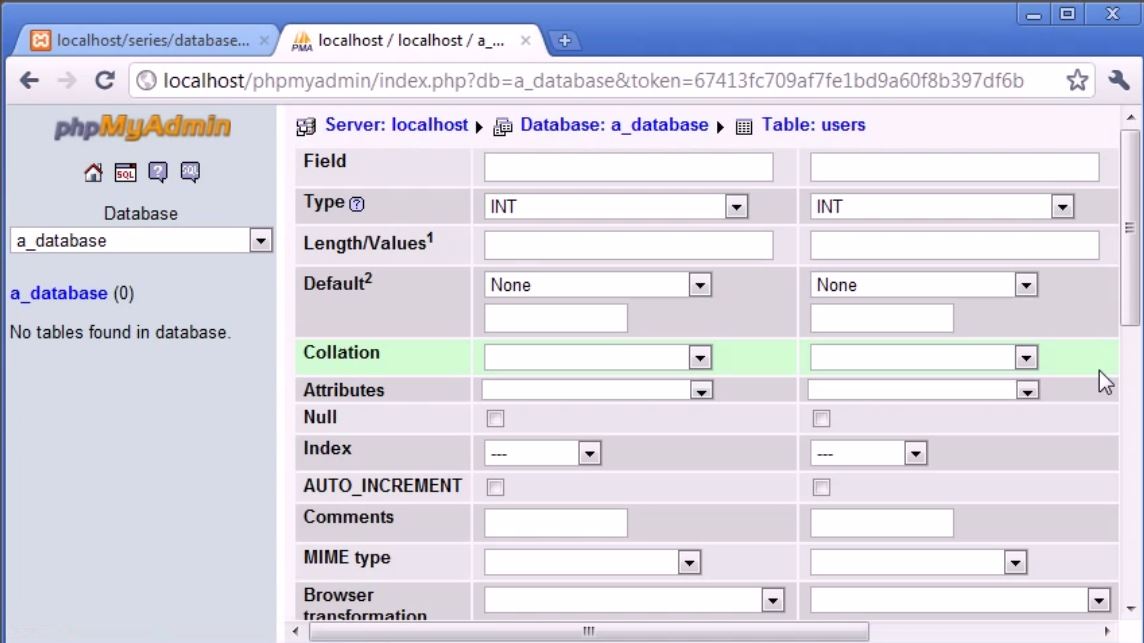
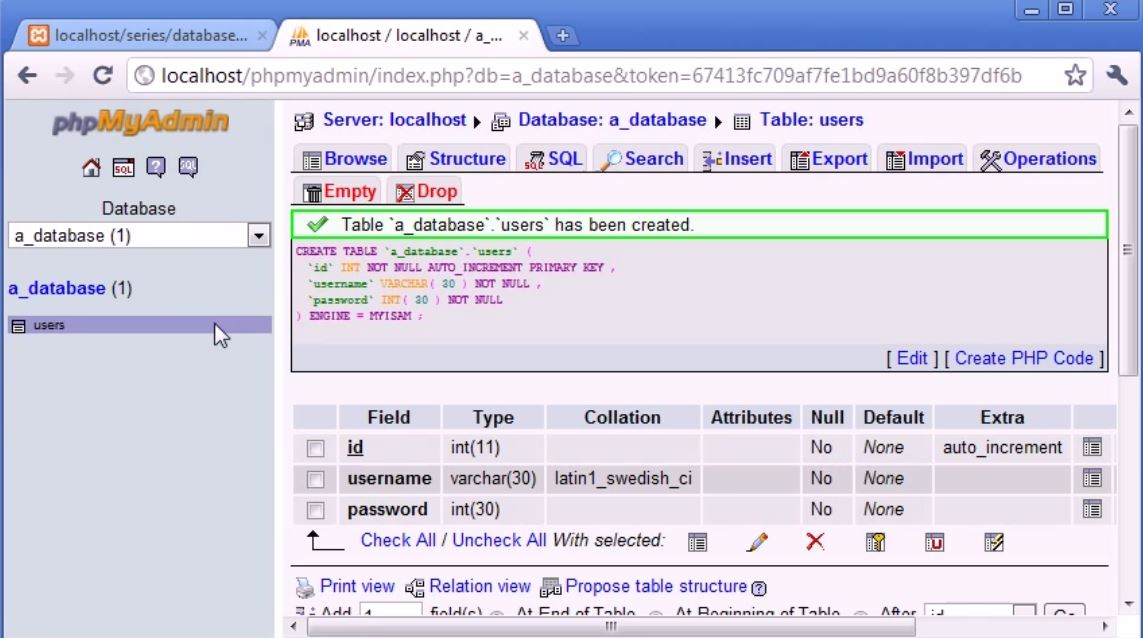
For field is the field name So, First one i am going to choose id, username, and last one is password, So, i had specified my field name inside the table. Now i need to specify the type of the data i want to store. Now storing different type of data is always like storing the variable with different type of data and You can see we have very extensive list of data like Int reference Integer we will discuss lot different types of data in later article. Now id remember is the number which will auto-increment will give each row unique value and You can see how it will works in the moment. Now id i will choose type int because it is integer. You can also define TINYINT, SMALLINT, MEDIUMINT, INT, BIGINT, are all types of data which are numeric. SO, i am going to choose INT for this You can also choose something like SMALLINT, Medium Int, However if you expect 100 users on your website This is fine however you are taking to Billions of users then you need to stick with INT data types. So Length/values we don't need to worry about it. Now 2 fields we need to focous in id fields are index and Auto_Increment fields.
Now Remember I said the primary key is the field or column the unique column to specify the unique column. This is the unique number column. So, Index field we assign primary key to id field. And we tick to AUTO_INCREMENT and this allows us to every-time we create a record we are increment this value. So, it will start 0 will be default. Then you create record you have value 1 then 2 then 3 and so on.
Now Let's Come to Username and Password Now obviously we don't want to save the username and password in INT data types. We will assign the VARCHAR. Now VARCHAR stands for variable character. So, what we can do here is we must specify the length/values field So, username say no more then 30 character. So, we can specify this is 30. Password will be adjust the same it may be less then 30 Characters. But this is something you going to have specify in your program. Let say you have to create user login system. You have to say you know give max length to text field. And check inside php if the password specified the username specified Word not more then 30 because anything bigger then 30 attempting to be written into this table it will be cut off.
Default values is the values if the user does not inputted and it may be saved default if the field is leaved blank it will saved by default value. If we create stayloggedin column and this may be equal to 1 or 0 depending on the user logged in. But by default it will be zero. If this make sense. Now we can come down and click on save.
 |
| Screenshot8 |
 |
| Screenshot9 |
 |
| Screenshot10 |
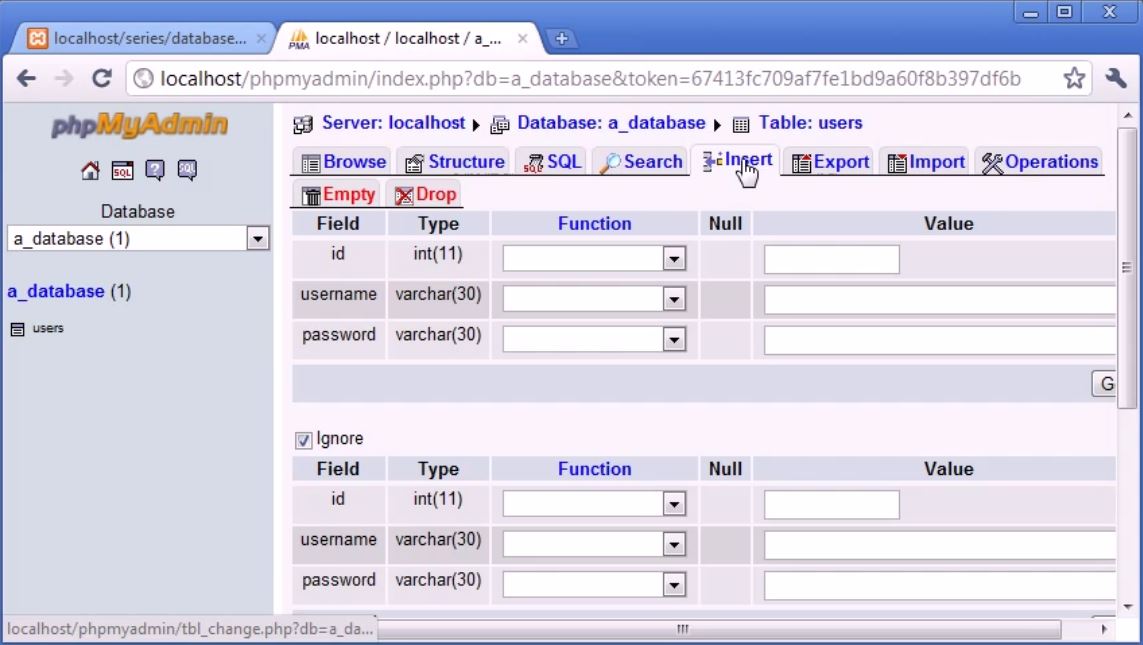
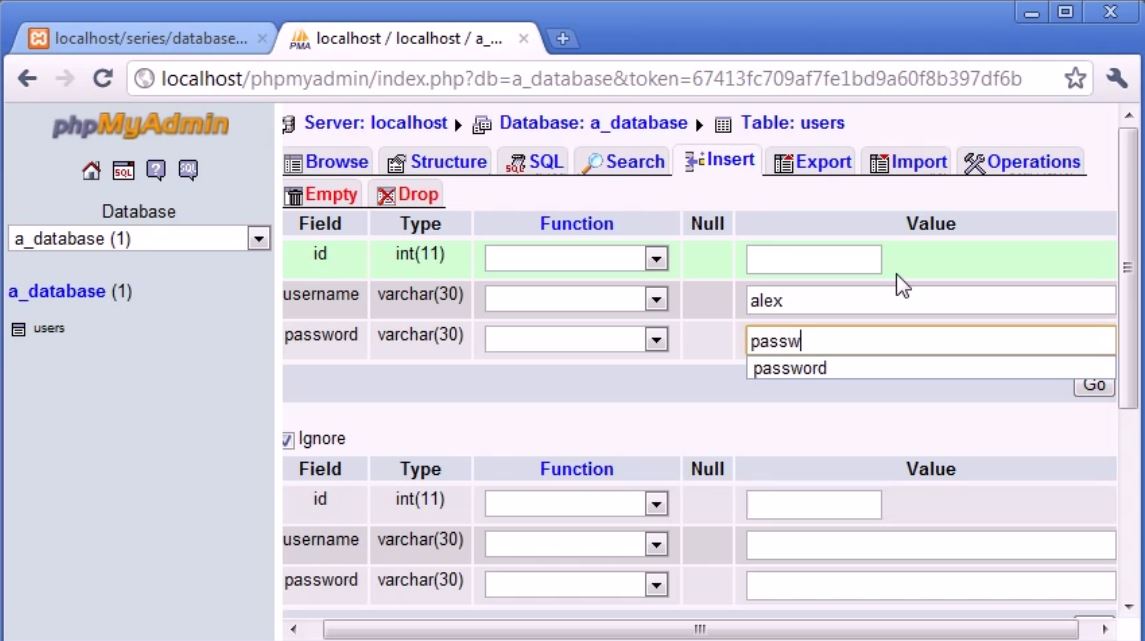
Now let see how to insert the data into this table because at the moment we got the table. But we don't got the data. Now this data you are going to inserting from the php. The form will check inside the php script of the username and password. However we can do manually from phpmyadmin if we wish to do so. So,i am going to click on insert Screenshot9. And id we can leave blank because remember its auto increment fields. We can specify left blank and it will automatically update. Now You can see the Screenshot10. We can also specify the rows of insertion we can also specify 40 rows for insertion for example. But Now I will Just Insert alex and Password and will click to go.
 |
| Screenshot11 |
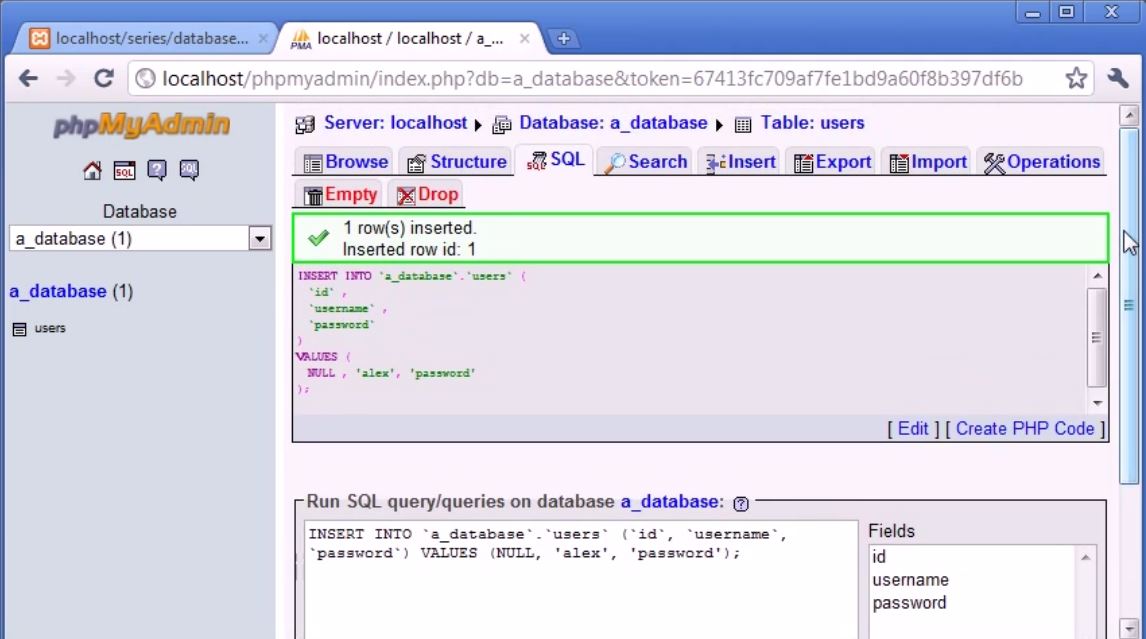
INSERT INTO 'a_database'.'users' {
'id',
'username',
'password'
}
VALUES {
NULL, 'alex','password'
};
Earlier i had told you about query How they can insert data Here we got insert into a_database which is the name of database dot users which is table we are accessing a_database table which is users. id, username, password and then with the value Null, for id we are not specifying value for the field because its auto-incremental. alex for the username, and password field value is password. So, Null corresponds to id, alex corresponds to username, and password corresponds to password.
 |
| Screenshot12 |
 |
| Screenshot13 |
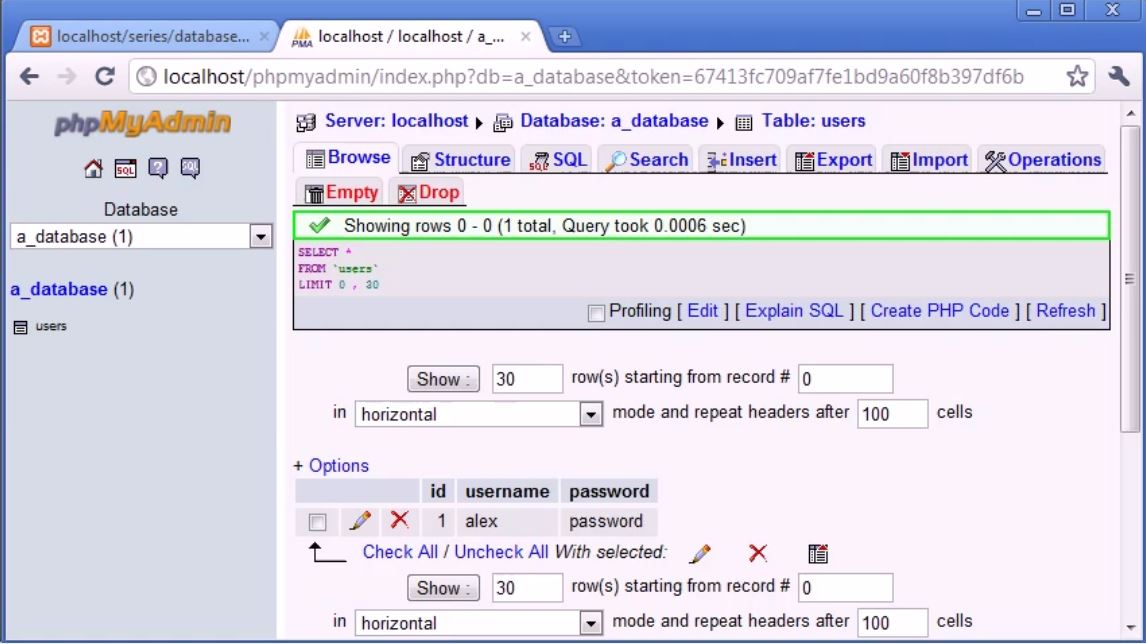
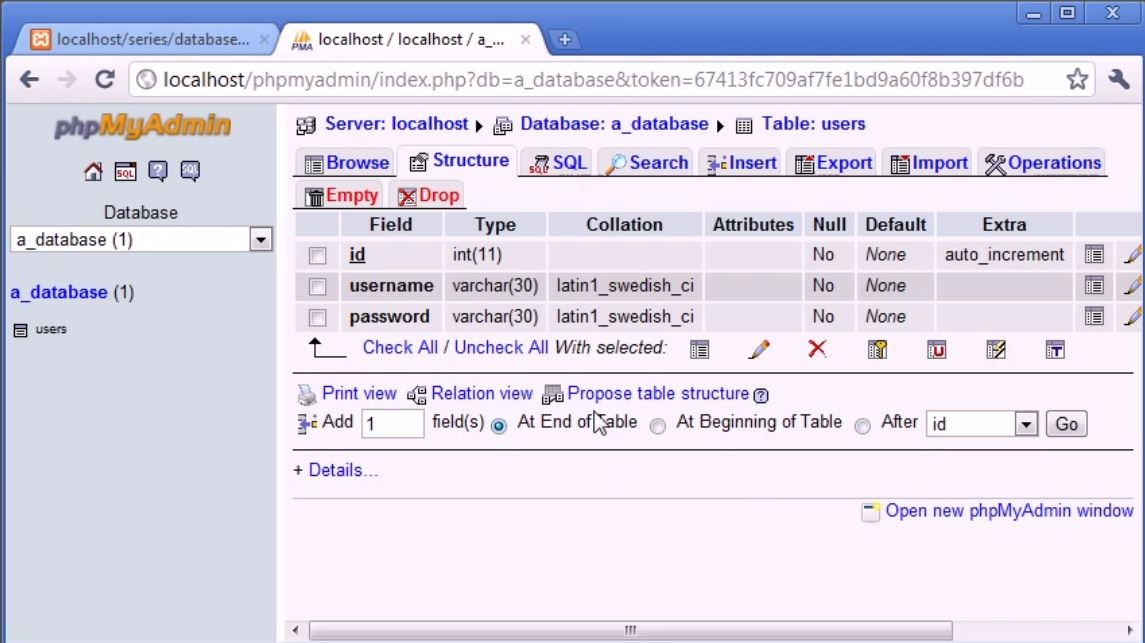
Screenshot12 you can see the representation of the data in our database. So let's insert another let's called this time billy and password pass123. Now we had inserted another row with id 2 remember that's auto increment. We perform query but with different values. You can see in browse tab. Now we are adding another Columns say first name and last name. So, Let see how we can do this. In Structure tab You can see at down add certain amount of fields at the end of the table , at beginning of table and after specified fields in our table. So, in my case i will insert fields at the end of the table. You can see in screenshot13 I will add 2 fields. Then same as earlier i will specify the field , type , length/ values Like firstname, lastname in fields, VARCHAR in type and length values are 40.
 |
| Screenshot14 |
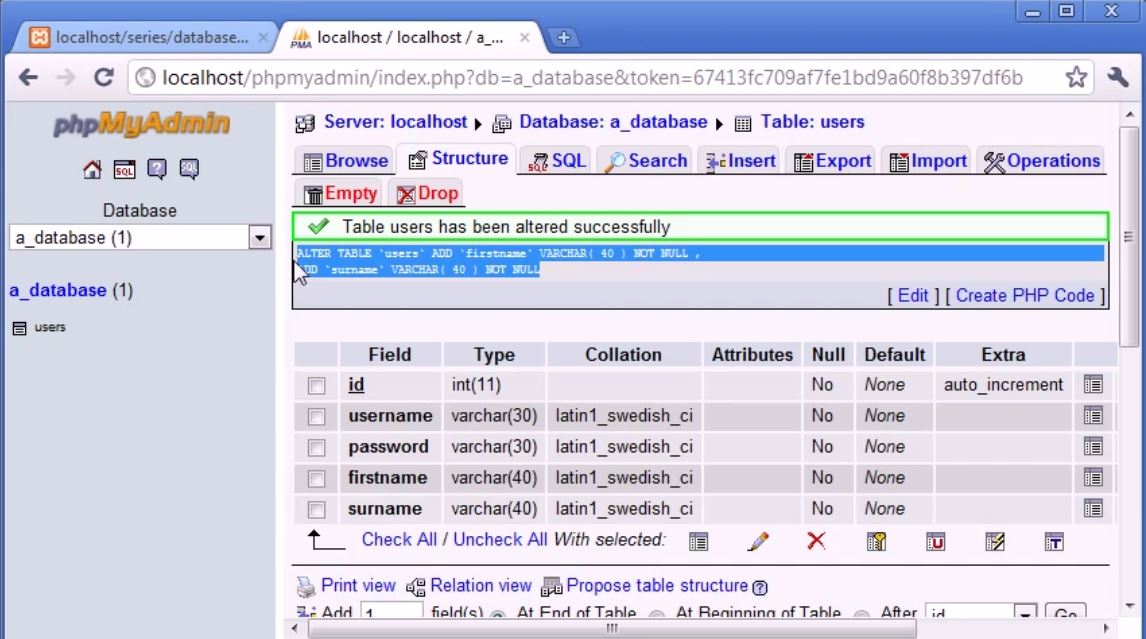
ALTER TABLE 'users' ADD 'firstname' VARCHAR (40) NOT NULL, ADD 'surname' VARCHAR (40) NOT NULL
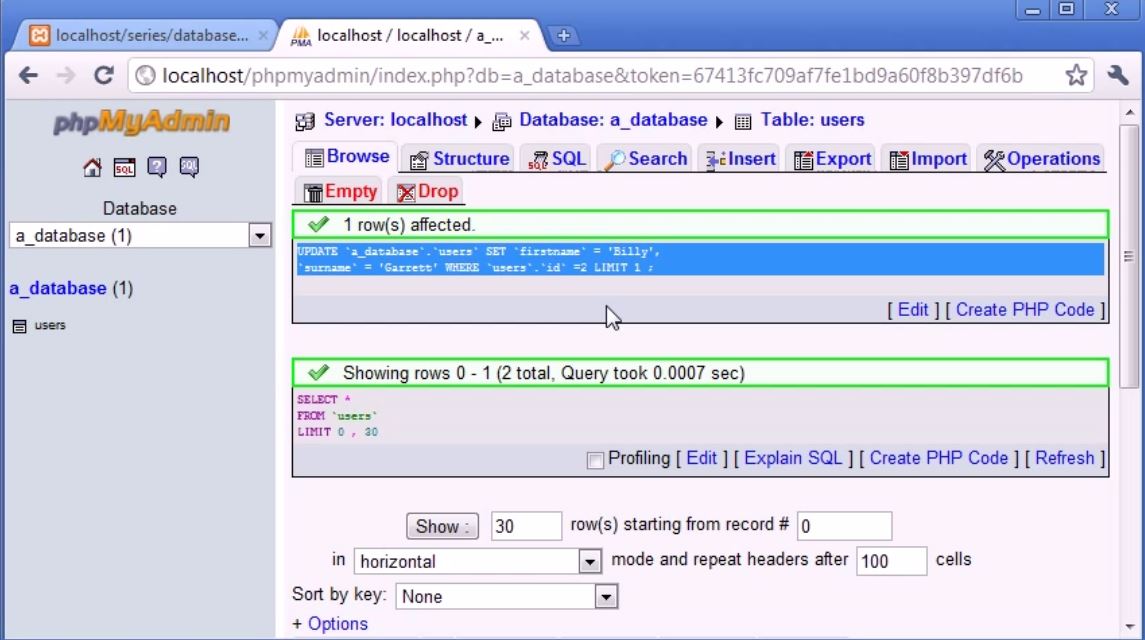
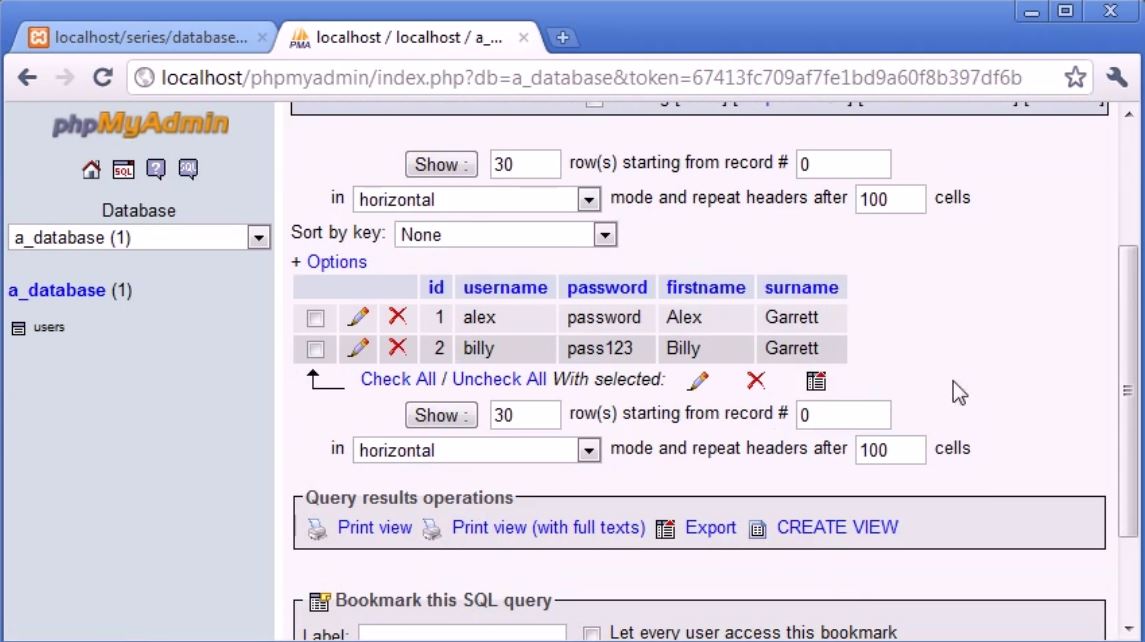
Here we are altering the users table with tow more fields firstname with varchar character 40 and not null it means it should contain some data. Surname varchar length 40 not null. So, this is our query to alter the table and add two fields at the end of the table. Now In Browse tab you can see the no data has been inserted to those fields so i will insert the data of the two existing fields in the table. For Updating the table in existing fields. It will Give us the query Screenshot15. So, every-time we perform query in phpmyadmin it usefully gives us the query back so if your structure is clean to understand the concept of the queries and how to structure them and what they do and how they work Later on then its really good thing to do just play around like insert things, delete things, change things, and just note of the query.
 |
| Screenshot15 |
 |
| Screenshot16 |


No comments:
Post a Comment
Thanks For Comment Will get you Soon..